
How to run Airflow on Kubernetes? Kubernetes is a popular open-source container orchestration system widely used in the industry. It is common to have Airflow running on Kubernetes in production to ensure reliability, scalability, and performance. However, Kubernetes is complex. There are so many things to deal with that it can be laborious to deploy an application. Hopefully, for us, some super bright people have created Helm. Helm allows you to deploy and configure Helm charts (applications) on Kubernetes at ease. A Helm chart is a collection of multiple Kubernetes YAML manifests describing every component of your application. That, my friend, makes your deployments much more accessible than ever before. And guess what? Apache Airflow has its own official Helm chart! In today’s tutorial, you will discover how to run Airflow on Kubernetes within 10 minutes, thanks to the official Helm chart. Let’s get started!
Ops, I almost forgot. If you want to create robust data pipelines with Airflow, go check out my courses here.
Prerequisites
In this hands-on tutorial, you will create a local multi-node Kubernetes cluster to deploy and run Airflow. Therefore, there are some prerequisites.
First, you need to install Docker and Docker Compose. Why? Because the Kubernetes cluster will run in Docker. You will have multiple Docker containers, and each container will represent a Kubernetes node. Now, you may ask: “How can I create a Kubernetes cluster with Docker?” Well, say hello to KinD!
KinD is the second tool you need. It allows you to set up and run a Kubernetes cluster using Docker container “nodes”. It was primarily designed for testing Kubernetes, but it is perfect for a quick local development environment to experiment with applications that run on top of Kubernetes. If you know MiniKube, Kind is pretty similar now (It wasn’t the case a few years ago).
In addition to Docker and KinD, you must install Helm and Kubectl. As you know, Helm allows you to deploy applications on Kubernetes, whereas Kubectl will enable you to run commands against your Kubernetes Cluster. Without Kubectl, you won’t be able to get logs of your PODs, debug errors, or check nodes.
That’s it. To run Airflow on Kubernetes, you need five tools: Docker, Docker Compose, KinD, Helm, and Kubectl. Once you’re done, you’re ready to go!
Create a Kubernetes cluster with KinD
Before deploying Airflow on Kubernetes, the first step is to create and configure the local Kubernetes cluster with KinD. Hopefully, it’s a pretty easy task. In a new directory, create a file kind-cluster.yaml
kind: Cluster
apiVersion: kind.x-k8s.io/v1alpha4
nodes:
  - role: control-plane
  - role: worker
    kubeadmConfigPatches:
      - |
        kind: JoinConfiguration
        nodeRegistration:
          kubeletExtraArgs:
            node-labels: "node=worker_1"
        extraMounts:
          - hostPath: ./data
        containerPath: /tmp/data
  - role: worker
    kubeadmConfigPatches:
      - |
        kind: JoinConfiguration
        nodeRegistration:
          kubeletExtraArgs:
            node-labels: "node=worker_2"
        extraMounts:
          - hostPath: ./data
        containerPath: /tmp/data
  - role: worker
    kubeadmConfigPatches:
      - |
        kind: JoinConfiguration
        nodeRegistration:
          kubeletExtraArgs:
            node-labels: "node=worker_3"
        extraMounts:
          - hostPath: ./data
        containerPath: /tmp/data
This file describes your local Kubernetes Cluster. It creates four nodes, one control plane, and three workers. Each worker node has a label helping to run tasks on a specific node. For example, with the KubernetesExecutor or the KubernetesPodOperator, you can set a nodeSelector argument to run tasks on a particular node 😉
In addition, each worker has the extraMounts field defined. Why? It allows you to mount a hostPath persistent volume to store the logs of your tasks from your pods to your machine. Without this, you wouldn’t be able to access your logs once your tasks are complete in Airflow. That means, next to your kind-cluster.yaml, you must create a data directory to store the logs on your machine and they will be accessible in /tmp/data in your Kubernetes cluster.
Let’s execute the following command to create your Kubernetes cluster:
kind create cluster --name airflow-cluster --config kind-cluster.yamlWe can run some checks:
➜  kubectl cluster-info

Kubernetes control plane is running at https://127.0.0.1:64683
CoreDNS is running at https://127.0.0.1:64683/api/v1/namespaces/kube-system/services/kube-dns:dns/proxy

To further debug and diagnose cluster problems, use 'kubectl cluster-info dump'.

➜  kubectl get nodes -o wide
NAME                            STATUS   ROLES           AGE    VERSION   INTERNAL-IP   EXTERNAL-IP   OS-IMAGE                         KERNEL-VERSION    CONTAINER-RUNTIME
airflow-cluster-control-plane   Ready    control-plane   2m     v1.27.3   172.19.0.5    <none>        Debian GNU/Linux 11 (bullseye)   6.4.16-linuxkit   containerd://1.7.1
airflow-cluster-worker          Ready    <none>          101s   v1.27.3   172.19.0.2    <none>        Debian GNU/Linux 11 (bullseye)   6.4.16-linuxkit   containerd://1.7.1
airflow-cluster-worker2         Ready    <none>          101s   v1.27.3   172.19.0.3    <none>        Debian GNU/Linux 11 (bullseye)   6.4.16-linuxkit   containerd://1.7.1
airflow-cluster-worker3         Ready    <none>          102s   v1.27.3   172.19.0.4    <none>        Debian GNU/Linux 11 (bullseye)   6.4.16-linuxkit   containerd://1.7.1
If everything’s good, you’re ready for the next step.
Airflow on Kubernetes
To deploy Airflow on Kubernetes, the first step is to create a namespace:
kubectl create namespace airflow
kubectl get namespaces
Then, thanks to Helm, you must fetch the official Helm of Apache Airflow that will magically get deployed on your cluster. Or, almost magically.
helm repo add apache-airflow https://airflow.apache.org
helm repo update
helm search repo airflow
helm install airflow apache-airflow/airflow --namespace airflow --debug
In this order:
1️⃣ First, you add the official repository of the Apache Airflow Helm chart.
2️⃣ Then, you update the repo to ensure you have its latest version (You can look at the current version with search repo).
3️⃣ Finally, you deploy Airflow on Kubernetes with Helm install. The application name will be airflow, and the flag –-debug allows you to check if anything goes wrong during the deployment.
After a few minutes, you should see your Pods running, corresponding to the different Airflow components (Scheduler, Web Server, etc).
➜  kubectl get pods -n airflow

NAME                                 READY   STATUS    RESTARTS   AGE
airflow-postgresql-0                 1/1     Running   0          3m39s
airflow-redis-0                      1/1     Running   0          3m39s
airflow-scheduler-77b484b6d5-hhpvj   2/2     Running   0          3m39s
airflow-statsd-7d985bcb6f-q2qfq      1/1     Running   0          3m39s
airflow-triggerer-0                  2/2     Running   0          3m39s
airflow-webserver-5b5cc47fc-68t8p    1/1     Running   0          3m39s
airflow-worker-0                     2/2     Running   0          3m39s

➜  helm ls -n airflow

NAME    NAMESPACE       REVISION        UPDATED                                 STATUS          CHART           APP VERSION
airflow airflow         1               2023-11-21 15:39:00.208869 +0400 +04    deployed        airflow-1.11.0  2.7.1
Each time you deploy a new version of your Airflow chart (after a modification or an update), you will obtain a new release, and the REVISION number will increase. If you made a mistake you can rollback to a previous REVISION number with helm rollback.
The last message on the terminal should be something like:
Thank you for installing Apache Airflow 2.7.1!
Your release is named airflow.
You can now access your dashboard(s) by executing the following command(s) and visiting the corresponding port at localhost in your browser:
Airflow Webserver: kubectl port-forward svc/airflow-webserver 8080:8080 --namespace airflow
Default Webserver (Airflow UI) Login credentials:
username: admin
password: admin
Default Postgres connection credentials:
username: postgres
password: postgres
port: 5432
You can get Fernet Key value by running the following:
echo Fernet Key: $(kubectl get secret --namespace airflow airflow-fernet-key -o jsonpath="{.data.fernet-key}" | base64 --decode)
###########################################################
# WARNING: You should set a static webserver secret key #
###########################################################
You are using a dynamically generated webserver secret key, which can lead to
unnecessary restarts of your Airflow components.
Information on how to set a static webserver secret key can be found here:
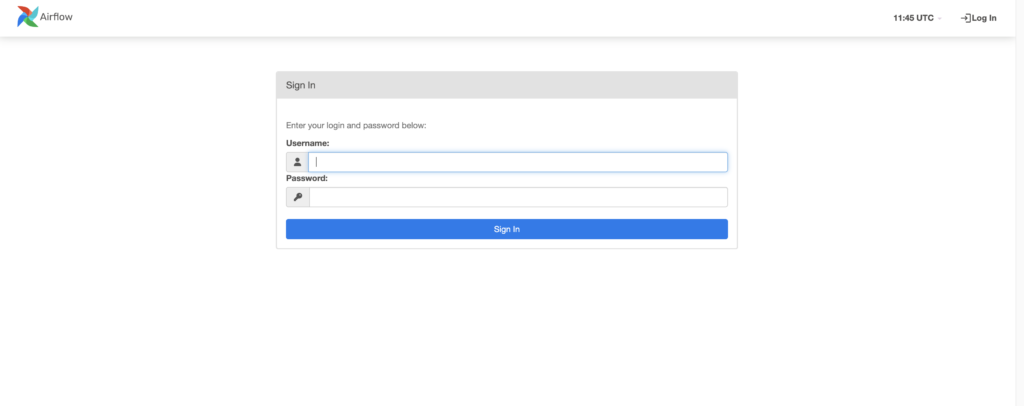
https://airflow.apache.org/docs/helm-chart/stable/production-guide.html#webserver-secret-keyOk, at this point you have successfully deployed Airflow on Kubernetes as shown below 😎
To access the Airflow UI, open a new terminal and execute the following command:
➜  kubectl port-forward svc/airflow-webserver 8080:8080 -n airflow

Forwarding from 127.0.0.1:8080 -> 8080
Forwarding from [::1]:8080 -> 8080
Then go to localhost:8080. Log in with admin/admin. Beautiful isn’t it?
Configure Airflow on Kubernetes
It’s great to have an Airflow instance running on Kubernetes but it would be better to configure it for your needs right? Let’s do it!
To configure an application deployed with Helm, you need to modify values.yaml. This file describes all your application’s configuration settings such as the Airflow version to deploy, the executor to use, persistence volume mounts, secrets, environment variables, etc.
To get this file (remove the existing one), execute the following command:
helm show values apache-airflow/airflow > values.yamlThat generates a new file values.yaml. Open it and change the executor setting from CeleryExecutor to KubernetesExecutor.
# Airflow executor
# One of: LocalExecutor, LocalKubernetesExecutor, CeleryExecutor, KubernetesExecutor, CeleryKubernetesExecutor
executor: "KubernetesExecutor"
Also, you can create variables and connections when you deploy Airflow by using a ConfigMap.
Create a file variables.yaml with the following content:
apiVersion: v1
kind: ConfigMap
metadata:
  namespace: airflow
  name: airflow-variables
data:
  AIRFLOW_VAR_MY_S3_BUCKET: "s3bucket"
This ConfigMap will export the environment variable AIRFLOW_VAR_MY_S3_BUCKET that translates to the Airflow variable my_s3_bucket with the value s3bucket. If you discover this syntax, here is a complete tutorial about Airflow variables.
Finally, add this ConfigMap to your deployment by updating extraEnvFrom in values.yaml:
# Extra envFrom 'items' that will be added to the definition of airflow containers
# A string is expected (can be templated).
extraEnvFrom: |
  - configMapRef:
      name: 'airflow-variables'
Add the ConfigMap to your cluster:
➜  kubectl apply -f variables.yaml

configmap/airflow-variables created
Deploy Airflow on Kubernetes with the updated settings in values.yaml:
➜  helm ls -n airflow

NAME    NAMESPACE       REVISION        UPDATED                                 STATUS          CHART           APP VERSION
airflow airflow         1               2023-11-21 15:39:00.208869 +0400 +04    deployed        airflow-1.11.0  2.7.1

➜ helm upgrade --install airflow apache-airflow/airflow -n airflow -f values.yaml --debug


➜ helm ls -n airflow

NAME    NAMESPACE       REVISION        UPDATED                                 STATUS          CHART           APP VERSION
airflow airflow         2               2023-11-21 16:15:59.573326 +0400 +04    deployed        airflow-1.11.0  2.7.1
This time, you pass values.yaml to the command helm upgrade and check the Airflow Revision before and after the upgrade. You can see that it increased from 1 to 2.
How to run Airflow commands in Kubernetes
To verify if the Airflow variable MY_S3_BUCKET exists, you must access a pod where an Airflow component runs. Remember that Airflow variables created with environment variables neither appear on the Airflow UI nor in the Airflow CLI.
First, list your pods:
➜  kubectl get pods -n airflow

NAME                                 READY   STATUS    RESTARTS   AGE
airflow-postgresql-0                 1/1     Running   0          48m
airflow-scheduler-7fdf9d7cd6-cpnn9   2/2     Running   0          6m16s
airflow-statsd-7d985bcb6f-q2qfq      1/1     Running   0          48m
airflow-triggerer-0                  2/2     Running   0          6m14s
airflow-webserver-5945d64648-pbfmb   1/1     Running   0          6m16s
Then, pick the airflow-scheduler pod and run the Airflow command:
➜  kubectl exec -n airflow airflow-scheduler-7fdf9d7cd6-cpnn9 -c scheduler -- env | grep VAR

AIRFLOW_VAR_MY_S3_BUCKET=s3bucket
You must use the option -c to specify the container to use as the Airflow scheduler pod runs two containers.
You can see above that the environment variable has been exported!
Install dependencies for Airflow on Kubernetes
Imagine you have a DAG that uses Spark. However, the provider Spark is not installed by default in Airflow. Therefore, how can you install this provider? What is the easiest way to install any provider in Airflow on Kubernetes?
The answer is… install your dependencies in the Docker image!
Create a file requirements.txt, and add the provider:
apache-airflow-providers-apache-spark==4.4.0Create a Dockerfile:
FROM apache/airflow:2.7.1
COPY requirements.txt .
RUN pip install -r requirements.txt
Build the Docker image and load it into your local Kubernetes cluster. In a real-work scenario, that would be a private registry.
➜ docker build -t airflow-custom:1.0.0 .

➜ kind load docker-image airflow-custom:1.0.0 --name airflow-cluster

Image: "airflow-custom:1.0.0" with ID "sha256:6953c3a9bb76b33bde54ffcaab4fe4ec90f463691714bbce27cb74f487b2d199" not yet present on node "airflow-cluster-control-plane", loading...
Image: "airflow-custom:1.0.0" with ID "sha256:6953c3a9bb76b33bde54ffcaab4fe4ec90f463691714bbce27cb74f487b2d199" not yet present on node "airflow-cluster-worker2", loading...
Image: "airflow-custom:1.0.0" with ID "sha256:6953c3a9bb76b33bde54ffcaab4fe4ec90f463691714bbce27cb74f487b2d199" not yet present on node "airflow-cluster-worker3", loading...
Image: "airflow-custom:1.0.0" with ID "sha256:6953c3a9bb76b33bde54ffcaab4fe4ec90f463691714bbce27cb74f487b2d199" not yet present on node "airflow-cluster-worker", loading...
Pay attention that your custom Docker image of Airflow is based on the official Docker image 2.7.1 version. Putting your requirements into a Docker image is better than mounting the requirements.txt . Why? Airflow will install the dependencies each time a task runs in a Pod which adds unnecessary overhead, whereas with the custom Docker image, these dependencies are already installed. You save both time and compute resources.
Update values.yaml
# Default airflow repository -- overridden by all the specific images below
defaultAirflowRepository: airflow-custom

# Default airflow tag to deploy
defaultAirflowTag: "1.0.0"
And upgrade the chart:
➜ helm upgrade --install airflow apache-airflow/airflow -n airflow -f values.yaml --debug

➜ helm ls -n airflow

NAME    NAMESPACE       REVISION        UPDATED                                 STATUS          CHART           APP VERSION
airflow airflow         3               2023-11-21 16:15:59.573326 +0400 +04    deployed        airflow-1.11.0  2.7.1
You can check the providers with:
➜ kubectl exec <webserver_pod_id> -n airflow -- airflow providers listDeploy your DAGs on Kubernetes with GitSync
There are different ways to deploy DAGs in an Airflow on Kubernetes, but the easiest way is GitSync. GitSync acts as a sidecar container that runs along your PODs to synchronize the dags directory (in PODs) with the Git repository where you store your DAG files.
Let’s say you have this repository. To deploy the DAGs in your Kubernetes cluster, you need a few things:
1️⃣ Generate a private key with ssh-keygen
2️⃣ Update values.yaml as follow:
  gitSync:
    enabled: true

    # git repo clone url
    # ssh example: git@github.com:apache/airflow.git
    # https example: https://github.com/apache/airflow.git
    repo: ssh://git@github.com/marclamberti/airflow-2-dags.git
    branch: main
    rev: HEAD
    depth: 1
    # the number of consecutive failures allowed before aborting
    maxFailures: 0
    # subpath within the repo where dags are located
    # should be "" if dags are at repo root
    subPath: ""
    sshKeySecret: airflow-ssh-git-secret
3️⃣ Create a secret:
➜ kubectl create secret generic airflow-ssh-git-secret --from-file=gitSshKey=/your/path/.ssh/id_rsa -n airflow4️⃣ Check your secret:
➜ kubectl get secrets -n airflow5️⃣ Deploy the public key on the Git repository (Settings -> Deploy Key)
6️⃣ Finally, upgrade your Airflow instance:
➜ helm upgrade --install airflow apache-airflow/airflow -n airflow -f values.yaml --debugNow, if you wait up to 5 minutes and refresh the DAGs page, you will see the DAGs.
Access logs with Airflow on Kubernetes
With the KubernetesExecutor, Airflow creates a new Pod each time a task runs. Once the task is completed, Airflow deletes the Pod and so the logs.
Therefore, you need a way to store your logs somewhere so that you can still access them. For local development, the easiest way is to configure a HostPath PV. Let’s do it!
First, you should already have a data directory on your local machine next to the file kind-custer.yaml.
Next, you must set up the Persistent Volume to provide a durable location to prevent losing data:
apiVersion: v1
kind: PersistentVolume
metadata:
  name: airflow-logs
  labels:
    app: airflow-logs
spec:
  storageClassName: manual

  capacity:
    storage: 20Gi
  accessModes:
    - ReadWriteMany
  claimRef:
    apiVersion: v1
    kind: PersistentVolumeClaim
    name: airflow-logs
    namespace: airflow
  hostPath:
    path: /tmp/data/
➜ kubectl apply -f pv.yaml
➜ kubectl get pv -n airflowThen, you create a Persistent Volume Claim to bind the PV with Airflow:
apiVersion: v1
kind: PersistentVolumeClaim
metadata:
  name: airflow-logs
  namespace: airflow
  labels:
    app: airflow-logs
spec:
  storageClassName: manual
  accessModes:
    - ReadWriteMany
  resources:
    requests:
      storage: 20Gi
➜ kubectl apply -f pvc.yaml
➜ kubectl get pvc -n airflowFinally, update values.yaml
logs:
  persistence:
    # Enable persistent volume for storing logs
    enabled: true
    # Volume size for logs
    size: 100Gi
    # Annotations for the logs PVC
    annotations: {}
    # If using a custom storageClass, pass name here
    storageClassName:
    ## the name of an existing PVC to use
    existingClaim: airflow-logs
And upgrade your Airflow instance
➜ helm upgrade --install airflow apache-airflow/airflow -n airflow -f values.yaml --debugIf you run your DAGs and click on your tasks, you can access the logs. Well done!
In practice
If you want to see how to start with the official Helm chart, check out the video below:
Conclusion
In this tutorial, you have successfully deployed Airflow on a multi-node Kubernetes Cluster. Even better, you have a local development environment where you can make experiments and tests without destroying your production environment 😁
PS: If you want to dive deep into Apache Airflow, check out my courses here