
At the end of this introduction to Airflow, you will be all set for getting started with Airflow. You will start with the basics, such as what Airflow is and the essential concepts. Then you will set up and run your local development environment using the Astro CLI to create your first data pipeline. I hope you’re getting excited. Fasten your seatbelt, take a deep breath, and let’s go 🚀
For a complete hands-on introduction to Apache Airflow, here is a 6-hour course at a discount.
Introduction to Airflow: What it is?

If you look at the official documentation of Apache Airflow, it is an open-source platform for developing, scheduling, and monitoring batch-oriented workflows. Concretely, you must create data pipelines to produce valuable data for later analytics or machine learning. A data pipeline is nothing more than inputs that go through different steps executed in a specific order to produce outputs. For example, you can use a DAG that uploads a CSV file into an S3 bucket, then transforms the data using AWS EMR and loads the data into AWS Redshift. To create, schedule, and monitor this kind of data pipeline you need a tool. Otherwise, you will quickly become overwhelmed by the amount of tasks and pipelines to manage yourself. That’s the purpose of an orchestrator, in this case, Airflow. It helps authoring, controlling, and monitoring your (batch) data pipelines.
By the way, I have an article that deeply covers what Airflow is here and a video that explains why Airflow.
Airflow Concepts
The first and foremost concept to know is DAG. DAG means Directed Acyclic Graph. It’s a graph with nodes and directed edges between the nodes. In Airflow, a DAG is a data pipeline where the nodes are the tasks and the edges are the dependencies between those tasks. When you create a data pipeline (workflow), you create a Python file that contains a DAG. When Airflow runs a DAG, it creates a DAG Run.
The second concept is an Operator. An Operator is a task. It encapsulates the logic to execute. Airflow has thousands of Operators to interact with over 80 different tools. For example, the PythonOperator executes a Python function, the BashOperator executes a bash command, and so on. You can find any operator you want at the following link. When Airflow runs an Operator (a task), it creates a Task Instance.
Those are the two concepts you need for now 😉
Airflow Components
Airflow has four visible components when you run it:
- The Web server provides the user interface to interact and monitor your DAGs and Tasks.
- The Scheduler schedules your DAGs and Tasks.
- The Meta Database stores metadata related to your DAGs, Task Instances, Users, and more.
- The Triggerer handles a special kind of operators called Deferrable Operators (not important for now)
In addition to those four components, there are two others that you may not see:
- The Executor defines how and which system to run the tasks (LocalExecutor, KubernetesExecutor, etc). It is part of the Scheduler.
- The Worker executes one or multiple tasks.
That’s it. You know the concepts and components. Let’s set up and run Airflow locally.
Create your local environment
To start with Airflow, the first step is to set up and run it on your computer. There are different ways, such as:
pip install apache-airflow: If you have a terminal, Python and WSL2 (for Windows users), you can install Airflow manually with that command.- The docker-compose file: With Docker and the docker-compose file you can set up and run Airflow in three commands.
- The Astro CLI: If you have Docker and want a production-ready local development environment following best practices, this open-source project is perfect!
- Airflowctl: If you don’t have Docker, you can use airflowctl, an open-source command line interface for managing Airflow projects following best practices. Like with the Astro CLI, many things are set for you, and you get commands to control your environments easily.
For this tutorial, we will use the Astro CLI. If you are on Windows, you need WSL2 and Docker to make it work.
Step 1: Install the Astro CLI
On Mac, open your terminal and execute the command:
brew install astroIf you are on Windows or Linux, follow the instructions here. If you already have an Airflow instance running on your machine, skip this and jump to the DAG creation part.
Step 2: Create a new Apache Airflow project
To create an Airflow project that follows best practices, the only command to run is:
mkdir my_airfow_project
cd my_airfow_project
astro dev init
This creates a new project directory with the following structure:
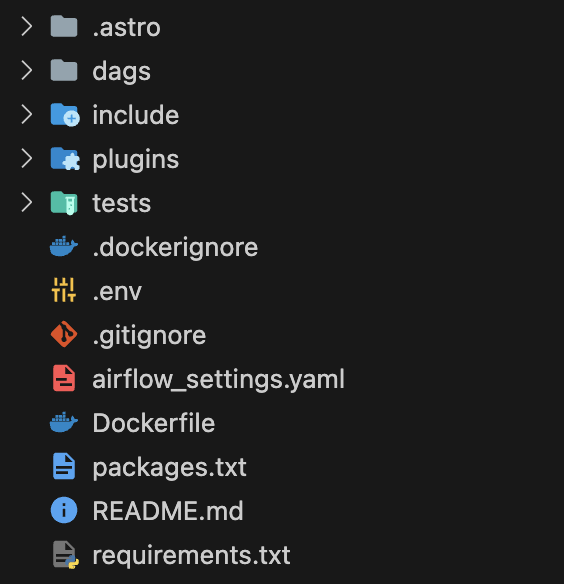
Let me give you a quick description of the files and directories:
dagscontains your data pipelines (DAG files)- include contains any other files you’d like to include (SQL queries, Python functions, etc)
pluginscontains your custom operators, etc.requirements.txtcontains the Python dependencies to install in your environment..envcontains the environment variables to export when your Airflow runs.airflow_settings.yamlcontains the project settings (connections, variables, etc)
Step 3: Configure Airflow with the Astro CLI
By default, the Astro CLI runs Airflow with the LocalExecutor and Postgres. That means you can only execute multiple tasks simultaneously. To change configuration settings of your instance, you can export environment variables with .env. For example:
AIRFLOW__CORE__EXECUTOR=SequentialExecutorAIRFLOW__CORE__EXECUTOR overwrites the setting executor, under the section core in the Airflow configuration file.
Don’t do it; it’s for the example.
Step 4: Run Apache Airflow
astro dev start creates docker containers with the different Airflow components, installs a specific version of Apache Airflow specified in the Dockerfile, and sets up project dependencies. You must restart your project to install new Python dependencies and plugins, or when you change any project settings with astro dev restart.
Run Airflow with (make sure you are in your project directory):
astro dev startStep 5: Access the Airflow UI
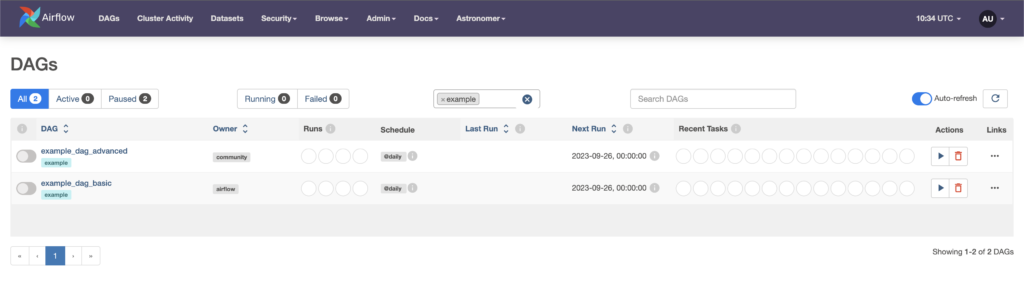
Then, open your web browser and go to localhost:8080.
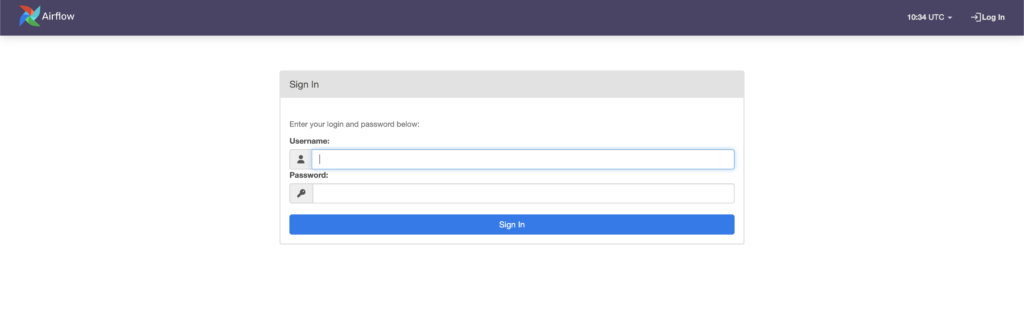
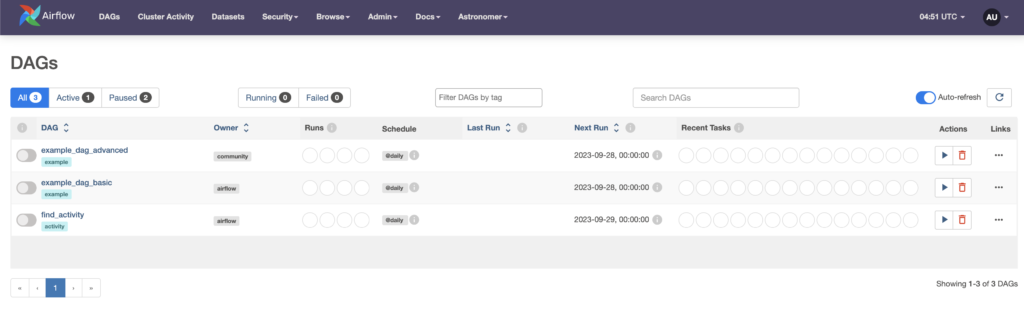
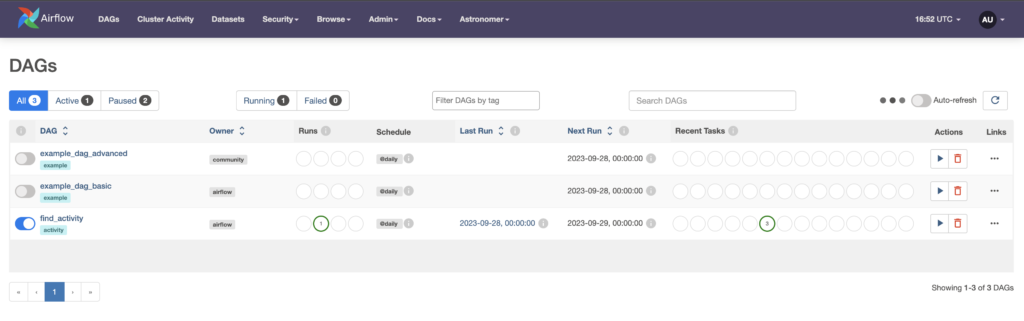
To log in, the username and password are admin. You should see the DAGs view:
To stop the instance, execute:
astro dev stopGetting started with Airflow DAGs
For this tutorial, you will create a simple data pipeline. If you want to build more complex pipelines with AWS, Snowflake, dbt, etc. You can check out this video and this one.
Here is the data pipeline you will build:

It requests boredapi that returns a JSON with a random activity to do. It creates a file and writes the activity in it. The last task reads the file to print the activity on the standard output. It’s a simple but interesting one as you’re about to discover. Let’s go 🚀
Step 1: Define the Airflow DAG
In the dags directory, create a file find_activity.py and open it.
Add the following imports:
from airflow.decorators import dag
from pendulum import datetime
You will always make those imports. The first line imports the DAG object. That’s how Airflow recognizes a file as a DAG. The second line of imports datetime is used to create the start date. Think of the start date as the date your DAG starts being scheduled. Under the imports, define the DAG object:
@dag(
  start_date=datetime(2023, 1, 1),
  schedule="@daily",
  tags=["activity"],
  catchup=False,
)
def find_activity():
  pass

find_activity()
Quick explanations:
@dagis the DAG decorator to create your DAG.scheduledefines how often the scheduler triggers your DAG and expects a CRON expression (There are other ways, but let’s stay simple). Here, every day at midnight.tagsallow filtering DAGs on the user interface.catchupat false avoids running non-triggered DAG runs between the last time the DAG was triggered and the current date.
Finally, create a function for your tasks and dependencies under the DAG decorator. That function’s name is your DAG’s unique identifier, and you must call the function at the end of the file otherwise Airflow won’t recognize this file as a DAG.
Step 2: Fetch data from an API with Airflow
The first Airflow task requests boredapi to fetch a random activity. To do that, you can use the PythonOperator. The PythonOperator executes a Python function or a script. Either you call the PythonOperator, or you use the decorated version with @task. The latest is the easiest. Let’s see how to create this task:
import requests

API = "https://www.boredapi.com/api/activity"

@dag(...)
def find_activity():

  @task
  def get_activity():
    r = requests.get(API, timeout=10)
    return r.json()

find_activity()
You import requests, an HTTP library to make requests. Then, you create a variable API with the link to boredapi. Call the @task decorator and define the Python function get_activity to execute under the decorator. The name of the Python function is the unique identifier of that task within the DAG. That is the task’s name you see on the UI. In the Python function, you implement the logic to request the API and return the activity in JSON.
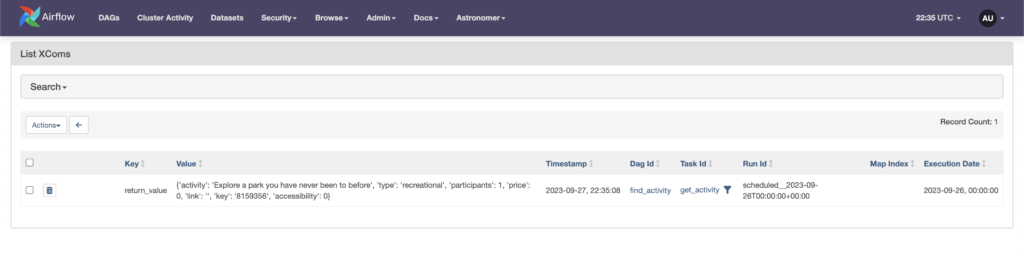
By the way, when you return a value from a Python function, that creates an Airflow XCom that allows data sharing between tasks. If you don’t know an XCom, look at this tutorial.
Executing the task produces the following output in Admin -> XComs.
Step 3: Write into a file with the PythonOperator
The second task creates a file activity.txt in the include directory and writes the activity fetched by the previous task.
As for the first task, you can use the PythonOperator with @task:
@task
def write_activity_to_file(response):
  filepath = Variable.get("activity_file")
  with open(filepath, "a") as f:
    f.write(f"Today you will: {response['activity']}")
  return filepath
The task’s name is write_activity_to_file, and it takes a parameter response. This parameter is the activity returned by the previous task get_activity.
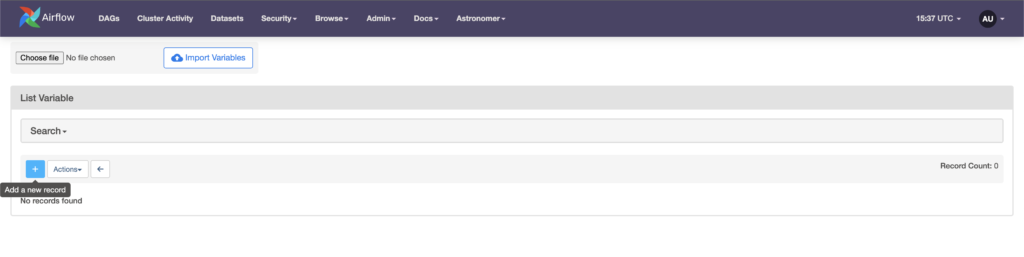
Something new here is the Variable.get. With Airflow, you can create Variables for values to include in different DAG files or tasks. It is useful when you need to change a Variable’s value. Instead of updating this value at different places (DAGs, tasks, etc), you do it once in the Variable. To create a Variable, you can use the user interface or the command line interface (the API too). Let’s do it with the UI.
Go to Admin -> Variables and add a new record.
The key is the unique identifier of the Variable and val is the value to store. For the key type activity_file and for the val /tmp/activity.txt. (don’t add the last point)
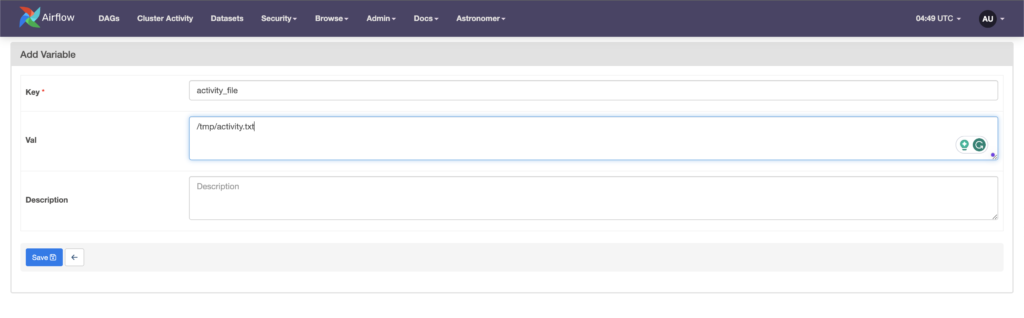
Click Save , and that’s it.
Back to the task, it opens the file activity.txt in /tmp/ as defined in the Variable. Writes the sentence: "Today you will: {response['activity']}" with the activity. Remember that response is a JSON value with the activity and comes from the first task.
Finally, it returns the filepath to share it with the last task to implement read_activity_from_file.
Step 4: Read the content of a file with the PythonOperator
The last task is the easiest one:
@task
def read_activity_from_file(filepath):
  with open(filepath, "r") as f:
    print(f.read())
Again, it takes a parameter filepath that the task write_activity_to_file returns. It opens this file and reads the content on the standard output. That’s it.
With the three tasks ready, the last step is to define the dependencies between them.
Step 5: Getting started with Airflow dependencies
Without dependencies, the Airflow Scheduler doesn’t know the order to execute your tasks. To create dependencies, you need:
- The right bitshift operator
>>:task_a >> task_b, here task_a is upstream to task_b and runs first. - The left bitshift operator <<:
task_a << task_b, here task_b is upstream to task_a and runs first. - To pass a value that a task returns as a parameter of another task:
task_b(task_a()), heretask_aruns first, thentask_b.
To define the dependencies of your DAG, add the following line after the last task:
read_activity_from_file(write_activity_to_file(get_activity()))You can see that we pass the activity that get_activity returns to write_activity_to_file. Then, we pass the filepath that write_activity_to_file returns to read_activity_from_file.
With multiple lines:
activity = get_activity()
filepath = write_activity_to_file(activity)
read_activity_from_file(filepath)
Final Airflow DAG
Here is the final data pipeline:
"""
### Fetch data from an API

This DAG fetches an activity from the boredapi.com API and writes it to a file
using task flow tasks.
"""

from airflow.decorators import dag, task
from airflow.models import Variable
from pendulum import datetime, duration
import requests

API = "https://www.boredapi.com/api/activity"

@dag(
  start_date=datetime(2023, 1, 1),
  schedule="@daily",
  tags=["activity"],
   catchup=False,
)
def find_activity():
  @task
  def get_activity():
    r = requests.get(API, timeout=10)
    return r.json()

  @task
  def write_activity_to_file(response):
    filepath = Variable.get("activity_file")
    with open(filepath, "a") as f:
      f.write(f"Today you will: {response['activity']}")
    return filepath

  @task
  def read_activity_from_file(filepath):
    with open(filepath, "r") as f:
      print(f.read())

  read_activity_from_file(write_activity_to_file(get_activity()))

find_activity()
Save the file, go to the Airflow UI, and refresh the page. If you don’t see your DAG, wait up to 5 minutes. In case of an error, try to troubleshoot it 😉.
Now, click on the DAG’s name and Graph, and you should see that:
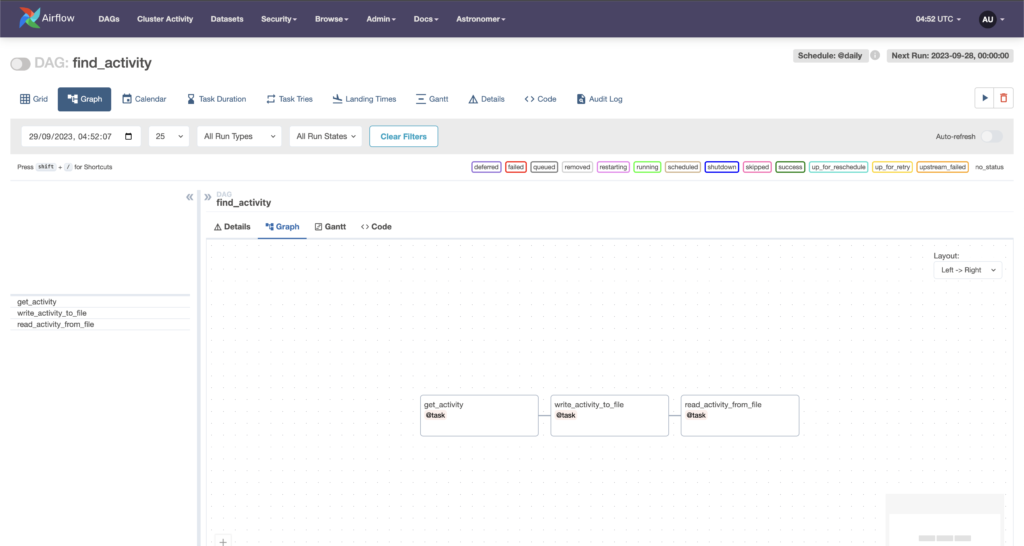
Getting started with Airflow: Running and monitoring DAGs
Alright, the DAG is ready. Let’s trigger it! Press the toggle left to the DAG’s name and refresh the page. You will see one DAG run running:
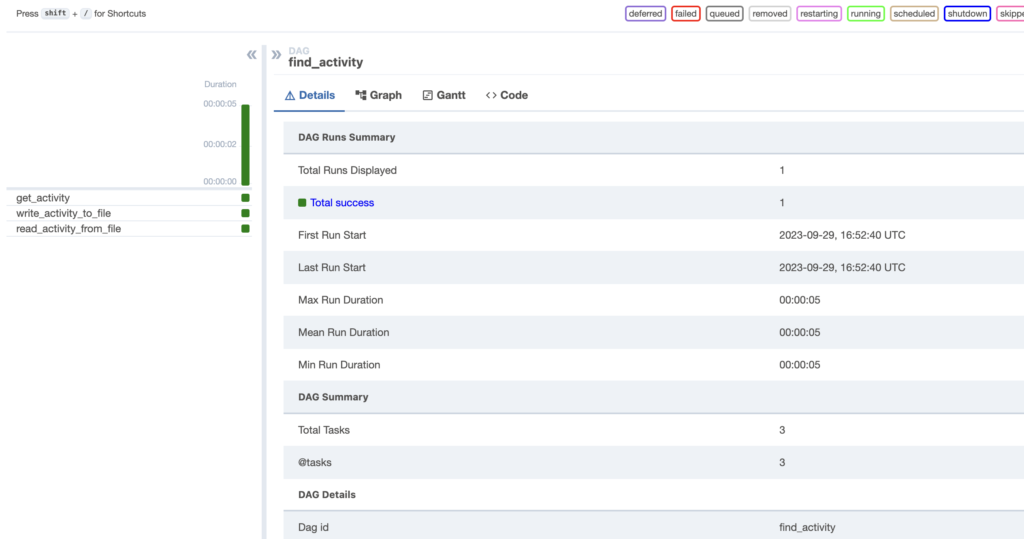
Click on the DAG’s name. The view by default is the Grid view and provides historical and current states of your tasks instances, and DAG runs. The top bars are the DAG runs; the squares are the task instances. If you click on a DAG run, you get associated metrics such as first-run start, last-run start, mean duration (useful to define timeouts), and more.
Click on the square that corresponds to read_activity_from_file. That forwards you to a details page containing the status, operator, trigger rules, etc. More importantly, you can access the logs, and if you carefully look at them, you will find the activity:
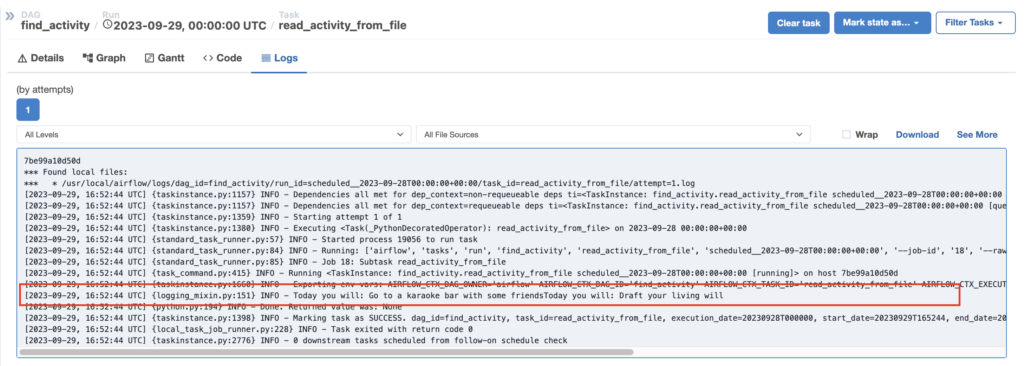
Congratulations! 🥳
Getting started with Airflow in Action!
The following video covers the tutorial:
Conclusion
Congratulations! You’re all set to get started with Airflow! You have successfully installed and run your Airflow instance with the Astro CLI. You have created your first data pipeline using Airflow’s latest features. Last, you’ve triggered and monitored your DAG with the UI. To explore more features and build real-world data pipelines, look at the following projects: here and this here.